Crafty Betty

Projects 115-118 of 365: Snow Swirled and Delightful Decorations Cards December 21, 2010

Hi all,

I’ve got some more Christmas cards for you…..Can you believe Christmas is just a few short days away!!!  I’ve barely started my Christmas shopping…LOL…..good thing I always give out a lot of handmade gifts….

On another note….. I just got braces on my teeth last week.  I had no idea the pain people really go through with these things!!!  I was expecting the teeth to be sore, no surprise there, but I had no idea how badly these things tear up the insides of your cheeks!!!  This is insanity-level pain, and I only have the top ones on right now (won’t be getting the bottom ones for another 3 months because they have to move the top ones a bit to get the lower ones to fit.).  And I also love how they wait to spring on the list of foods you can’t eat until they already have these torture devices on….. There are TONS of healthy foods on the list of things you can not eat…. so I better stock up on the vitamins.  Can’t have (or at least have to be very very careful with) raw vegetables, whole apples, nuts, popcorn, etc…..I know its logical, but it doesn’t mean I have to like it 🙂   On the other hand….On the suggested list are ice cream, cake, brownies, pudding….Doesn’t it sound like a license to go junk food crazy???  🙂

On to the cards….  All of these cards are pretty quick to finish, so if you still need to make more cards before Christmas hop to it, and try these on for size…

Project 115 of 365: Delights of the Season

115 of 365

115 of 365: Delights of the Season

Not much explanation needed for this one, just a simple card pieced together, but don’t you just love that ornament punch.  I could not have been happier than when I saw that Stampin Up had made two more stamp sets to use with this punch (Contempo Christmas and Tags Til Christmas), and they are both MUST HAVE sets!!!  (please ignore the sloppy glue marks on this one…..this was one of the earlier versions when I was experimenting with what to do with the strings on the ornaments….tiny glue dots are much less noticeable than using actual glue…)

Stamp Sets:  Delightful Decorations, Many Merry Messages

Project 116 of 365: Decorate with Joy


116 of 365

116 of 365: Decorate with Joy


Stamps Used: Delightful Decorations

Project 117 of 365: Snow Swirled Resist

117 of 365

117 of 365: Snow Swirled Resist

This card happened because I had seen a really similar card online somewhere last year, but I didn’t have the really pretty patterned paper that they had used on the bottom of the card….So I did what I do best….I improvised and made my own patterned paper.  I started with a plain old sheet of whisper white card stock.  Then I used my versamark glue pad to randomly stamp the snowflakes from the Snow Swirled Stamp Set all over my 12×12 sheet of cardstock.  I then sprinkled it with Iridescent Ice Emboss Powder and used my heat gun to emboss it.  After that I used a sponge dauber and Soft Suede Ink to rub all over the paper.  In person this really looks so much more beautiful and sparkly than in the picture.  It actually looks quite suede like from the rubbing of the ink across the paper and purposely applying the ink uneven.  This is one of those projects where it pays off to be sloppy 🙂  (this technique is called Emboss Resist.)

Stamps Used:  Snow Swirled, Teeny Tiny Wishes

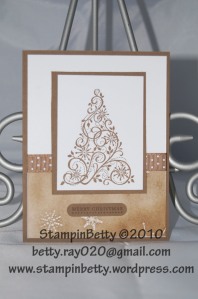
Project 118 of 365:  Snow Swirled Navy


118 of 365

118 of 365: Snow Swirled Navy


Ask anyone who has ever done a Christmas card class and they will likely tell you that I am obsessed with heat embossing.  I just love the effect, the smooth raised texture of the ink.  It just looks so classy and professional.  And running a close second to heat embossing would be using any of the emboss folders or texture plates in my Sizzix Big Shot.  “Texture, Texture, Texture” is my motto and I can’t get enough of it when I’m making cards!!  Seriously, all these texture effects are soooooo easy and so much cheaper than the been-there-done-that patterned paper that everyone has.  So don’t be intimidated by that heat gun, give it a shot, you will be hooked just like me.

If you are wondering how I got the tree and the greeting lined up so straight…..check out the Stamp-A-Ma-Jig (yes, that ‘s its real name.)  If you are a perfectionist this will be your best friend!!

Stamps Used:  Snow Swirled

Hope you guys are more prepared than I am for Christmas day 🙂

Stop Back Soon For More Fun!!!

StampinBetty


Projects 112-114 of 365: Christmas Cards for Elizabeth Residences December 13, 2010

I always enjoy doing card classes for the ladies (and a few gentlemen) at Elizabeth Residences, an assisted living facility about 45 minutes from my home.  I was so excited to be invited to do another class with them, as it has been several months since I have been back….

Then the morning of the class (last Thursday) I got the dreaded news that my grandmother (from Arkansas) had passed away over night.  I had just returned from flying out to see her and be with my mother after “Granny” had had a stroke the prior week.  I so hoped she would recover, as I hadn’t spent nearly as much time with her over the years as I had wished I had.  There was so much lost time that needed to be made up for from when my brother and I were children and custody cases led to our father taking us so far away from so much of our family.  In recent years as all the true stories of those dark days come to the surface I’ve been trying and promising to spend more time with this whole HALF of my family.  Its just so hard to accept that where I thought I still had several years its already too late.  I will always regret waiting too long.  I will always be sorry for not trying harder to visit like I said I would.  On the rare occasions that I did get to spend time with them it was so special for me, and it was a beginning to filling in that hole in my gut from wondering “who am I.”  Visiting down there always feels like its the place I am supposed to be.  There are people who look like me, and like the same things I like.  It feels like I place I could call home.

This year has been so tough…I lost both of my grandmothers in the past 5 months, and a long line of other misfortunes this year.  So All I can say is that I have no doubt that next year will be a better year.

….Anyways….I still went and held the card class, as I already had everything all planned and packed up ready to go…and I knew it would take my mind off things for a little while, since I couldn’t go back to Arkansas  any way….there was a huge winter storm on its way in….

Here are the three cards I had everyone make:

Projects 112-114 of 365: Christmas Cards for Elizabeth Residences

112

112 of 365: Simple Santa


The Simple Santa card is cased from a card by J. Belanger on SplitCoast Stampers

113

113 of 365: Blue Christmas


114

114 of 365: Ornamental Season


The Ornamental Season card is cased from a card by Marie Shaughnessy from SplitCoast Stampers.

Stamp Sets Used:

  • Many Merry Messages
  • Snow Swirled
  • Tags Til Christmas
  • Lovely as a Tree
  • Christmas Punch
  • Serene Snowflakes


Thanks for stopping by….be back soon!

StampinBetty


Projects 104-110 of 365: Scrabble Tile Necklaces November 19, 2010

Tis true…if you love Stampin Up’s Patterned Paper as much as I do you can wear it!!! 🙂

I’m sure you have all heard or seen this Scrabble tile jewelry trend, so ofcourse I just had to jump on the bandwagon.  And I am so glad I did…..These cute little pendants are so fun and easy to make.  All I did was trim little focal areas out of some of my favorite patterned paper, adhered it to the tile, sanded the edges and sealed it with epoxy resin, attached a jewelry bail (so I could dangle from necklace), and there you have it….I personalized piece of art for your neck or charm bracelet.

I also stamped a small image on one of them….the one with the little vine/leaves was just stamped in Really Rust ink onto Very Vanilla cardstock.

If anyone is interested in purchasing a pendant, necklace, or charm bracelet just let me know….I take custom orders.

Projects 104-110 of 365: Scrabble Tile Necklaces

(please excuse the photo quality…they were taken on my iphone and without proper lighting.)

104-109

Projects 104-109

Come Back for more fun Soon!!

StampinBetty


Project 101 of 365: Just Believe Birthday Card October 12, 2010

Well, as of yesterday I have been back at my old job of selling Mercedes Benz for one week….but I haven’t sold any cars yet….LOL!!  I expected it to take awhile to get back in the game.  I have to re-learn everything I forgot, and learn everything that has changed, plus become calmer so that I come accross as more confident to my customers.   Gee….its so much easier to “sound” confident on line…haha.  I’m sure the nerves will calm soon enough 🙂  Too bad “almost” only counts in horseshoes and hand grenades, because I’ve “almost” sold a bunch of cars.  LOL!!!!!

I’ve also been too tired to post anything when I get home from work, as my body still hasn’t gotten used to my new schedule.  I was so used to staying up late (especially since my husband works late), so trying to get to bed earlier has been a struggle, but slowly all is settling in 🙂

As always, I have a huge PILE of projects just waiting to be blogged about.  Starting with this cute birthday card I made for my sister-in-law a few weeks ago.  This card is cased, and I will add the name of the original crafter as soon as I find it.  (I’m on a break at work, and my notes are at home.)

Project 101 of 365: Just Believe Birthday Card

101 of 365

101 of 365: Just Believe Birthday Card

101 of 365

101 of 365: Just Believe Birthday Inside


Supplies:

Paper:

  • Crumb Cake
  • Very Vanilla
  • Early Espresso

Stamps:

  • Just Believe
  • Full of Life

Ink:

  • Cherry Cobbler
  • Crumb Cake
  • Crushed Curry

Accessories:

  • Stickles
  • Vanilla Ribbon
  • Modern Label Punch
  • Punch Windows Set (for Sizzix, this is where that larger modern label is from)

Well, thats all for now.  Come back soon!

StampinBetty


Projects 94-96 of 365: 3×3 Halloween Cards September 26, 2010

Next, I based these 3 small cards on the 3×3 cards made by “cindy89” over on the Stampin Up! Demonstrator site.  These cards are almost completely copied from her cards.  There are only minor changes…

Projects 94-96:  3×3 Halloween Cards

94-96

94-96: Halloween 3x3's

94 of 365

94 of 365: Happy Halloween 3x3

95 of 365

95 of 365: 3x3 Owl Halloween

96 of 365

96 of 365: 3x3 Crow and Candle

Supplies:

Paper:

  • Cajun Craze
  • Basic Black
  • Whisper White
  • Wicked Fun DSP
  • Rich Razzleberry
  • Old Olive
  • Newsprint DSP
  • Very Vanilla
  • Old Olive DSP

Stamps:

  • Dark & Dreary
  • Teeny Tiny Wishes

Ink:

  • Basic Black
  • Cajun Craze

Accessories:

  • Circle Punches: 1/2″, 1 3/4″
  • 2″ Scallop Circle Punch (non SU)
  • Word Window Punch
  • Polka Dot Rich Razzleberry Ribbon
  • Scallop Trim Corner Punch
  • Rhinestone (non-SU)

Well, I’m off to a good start on my Halloween Cards.  I have a bunch more to post, but they will have to wait.

Until Next Time,

StampinBetty


Projects 89-90 of 365: Pumpkin Thank You’s September 22, 2010

A few days ago I stumbled across another blogger with a great Stampin’ Up! blog.  Her blog is Odden Designs (and while I didn’t copy the web address to link 😦 I do know it shows up right away if you google Odden Designs.  Well, she had these really cute, simple 3×3 thank you cards that I just loved.  So I had to make the 3×3 pumpkin card for myself (completely copied from her card) and then I made a simple modification by adding another, different shaped pumpkin and made it into a 4×4 card. So quick and simple that it will be hard for you to resist making these cards for yourself too 🙂

Project 89 of 365: Pumpkin Thank You Cards

89-90

89-90: Pumpkin Thank You Cards

Aren’t those pumpkins just too cute….just circle and oval punches are all you need…

Supplies:

Paper:

  • Basic Black
  • Old Olive
  • Whisper White

Stamps:

  • Because I Care (“thank you”)
  • Baroque Motifs

Ink:

  • Chocolate Chip
  • Old Olive

Accessories:

  • Oval Punch
  • Circle Punch
  • Modern Label Punch
  • Square Lattice Textured Impressions Folder
  • Sizzix Big Shot

My “texture day” is not over yet….I still have one more to post yet tonight 🙂

StampinBetty


Projects 83-86: How much time do you have? September 9, 2010

Where to start, Where to start?….

I had started stamping some 4×4 panels with the bees from the Just Buzzin By stamp set.  I was just randomly stamping these with black ink, and as I saw them all laying out I had a great idea.  What if I started with the same basic panel, but then finished each card with varying amounts of “extras” to show you what you could accomplish in 5, 10, 15, and 20 minutes.

83-86

83-86 of 365: Just Buzzin By

It worked out great, because sometimes you need a card “right now”, so this 5 min notecard would work perfectly.  It is just the plain black/white bees mounted on 2 contrasting colors of cardstock.  It doesn’t get any simpler than this, yet it is so cute, and anyone would be happy to receive it with your personal note inside!!

Project 83 of 365:  Just Buzzin By in 5 Minutes

83 of 365

83 of 365: Just Buzzin By in 5 Minutes

Next, in 10 minutes you can color all the bees yellow (Daffodil Delight) to give it a little more pop…..

Project 84 of 365: Just Buzzin By in 10 Minutes

84 of 365

84 of 365: Just Buzzin By in 10 Minutes

With 15 minutes you can go another step further by completely coloring the bees, even giving them rosy little cheeks, and mounting them on contrasting layers of cardstock.

Project 85 of 365: Just Buzzin By in 15 Minutes

85 of 365

85 of 365: Just Buzzin By in 15 Minutes

If you have 20 minutes you can really deck this card out.  We have our panel with fully colored bees, mounted on several layers of cardstock, transformed into a 5 x 7 card, and then the braided taffeta ribbon (you braid this yourself from 3 strips of the 1/8″ ribbon).  This card is still super simple but with the coloring and the braiding it just takes longer.

Project 86 of 365: Just Buzzin By in 20 Minutes

86 of 365

86 of 365: Just Buzzin By in 20 Minutes

Supplies:

Paper:

  • Whisper White
  • Basic Black
  • Daffodil Delight
  • Bashful Blue

Stamps:

  • Just Buzzin By

Ink:

  • Staz On- Black (or Memento- Tuxedo Black)
  • Stampin Write Markers

Accessories:

  • Snail Adhesive
  • 1/8″ Taffeta Ribbon

So there you have it, how much time do have?

StampinBetty


Project 81 of 365: Black Magic Get Well Wishes September 4, 2010

If you live in Wisconsin, isn’t this some crazy weather?  A few days ago it was so hot and humid that you didn’t want to leave your house, now its chilly and windy and you need a sweater.  Wow, it was summer one day and fall the next.

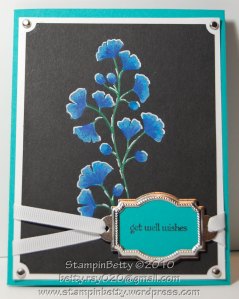
This card is another one made from all those Black Magic blocks I had made way back when.  And again, I’m sticking with some bold colors on this one.  I really like the way this one turned out with the different shades of blue pencil, set off by the Bermuda Bay paper.  The Layout is super quick and simple so keep the layout in mind for the next time you need a quick card. (The coloring isn’t so quick, but it is simple.)

If you need direction on how to do the Black Magic Technique just read the previous post (Project 80.)

Project 81 of 365: Black Magic Get Well Wishes

81 of 365

81 of 365: Black Magic Get Well Wishes

Supplies:

Paper:

  • Bermuda Bay
  • Basic Black
  • Whisper White

Stamps:

  • Kind & Caring Thoughts (retired hostess set)
  • Teeny Tiny Wishes

Ink:

  • Whisper White Craft
  • Basic Black Marker
  • White Gel Pen

Accessories:

  • Hodge Podge Hardware- Silver
  • 1/4″ Grosgrain Ribbon

Thanks for checking out another card 🙂

StampinBetty


Project 80 of 365: Black Magic Birthday Card September 2, 2010

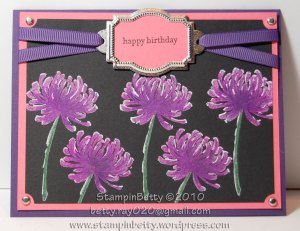
So awhile back when I first discovered the Black Magic Technique I stamped and colored soooooo many images, but then they just sat in a pile waiting to be used, so today I decided to use a couple of them.  Not only this, but I also challenged myself to use colors I don’t normally use.  I decided it was time to be BOLD and use some bold colors, since I almost always tend to stick with Earthtones and Neutrals.  I just like “warm” colors 🙂  I do, somewhat, have a mixed feelings over my use of such dramatic and contrasting colors here, but in the end I do like it…I guess that is why they call it challenging yourself.

In case you have not yet discovered the Black Magic technique, it is so cool and so simple.  All you do is take a piece of black (or any darker colored) cardstock and stamp solid images using Whisper White Craft ink.  You then heat set the Craft ink, and when it is set you color over the white areas with either Stampin’ Up!’s watercolor pencils or PrismaColor pencils (I suppose any colored pencil might work, but I have got great results from these 2 types of pencils.)  Remember to use multiple shades of the same color to get results with more depth, and for that extra kick highlight with a white gel pen.

Maybe the reason I like this technique so much is because I get to visit one of my childhood favorite past times….Coloring 🙂

Project 80 of 365: Black Magic Birthday Card

80 of 365

80 of 365: Kind and Caring Birtday

Supplies:

Paper:

  • Elegant Eggplant
  • Cameo Coral
  • Basic Black

Stamps:

  • Kind & Caring Thoughts (retired hostess set)
  • Teeny Tiny Wishes

Ink:

  • Basic Black- Marker
  • Whisper White- Craft Ink

Accessories:

  • PrismaColor Pencils or Watercolor Pencils
  • HodgePodge Kit- Silver
  • 1/4″ Elegant Eggplant Grosgrain Ribbon
  • Fancy Label Punch
  • Tag Corner Punch

Thanks for checking it out.  I have more in store for you so keep checking back 🙂

StampinBetty


Project 79 of 365: Weekend Wedding Card September 1, 2010

I’ve got a few cards to post for you today, so we will just have to see how far we get 🙂

So I am still searching for that “dream job.”  As much as I love crafting, with all the home repairs we are in need of and some of the things my husband and I want to do, I’ve decided it would be easier to do with a steady income, as you can never really predict what’s going to happen when you are running a tiny online craft business.  Don’t worry, I have no intention of abandoning everyone!!  This blog is my “therapy” and keeps me creating.  It is the perfect mix, because all of the jobs I am qualified for are so totally different than what I do here, my arts and crafts keep me well rounded 🙂  By education and professional experience I am a TOTAL numbers person, I actually have FUN running statistical models.  In graduate school I used to affectionately refer to my advanced stats homework as being like playing with a video game….if you keep working at it eventually you will get it “right.”   And I gotta tell ya….the feeling of satisfaction of being able to make sense of all the piles of what would seem like pointless data, or random effects to most people is much the same way as I feel when I complete a cool craft project.  My life needs both of these extremes to be satisfied 🙂

It would also be nice to work in a field that actually puts my Political Science Master’s Degree to work, and help payoff those student loans…LOL!

The project I am posting today is a wedding card I made for a wedding I attended about a week ago.  This card was super quick, and you might recognize that it is very similar to other wedding cards I made this summer.  I think this is because I loved the way that first one turned out, and since I was always running short on time for all the rest I ended up making different versions based on that card.  The one thing I have tried to do on ALL the cards was to match the colors of the wedding cards to their invitations/wedding colors.  I thought this would give the cards more of a personal touch.

Project 79 of 365: Weekend Wedding in Cherry Cobbler

79 of 365: Weekend Wedding in Cherry Cobbler

Supplies:

Paper:

  • Whisper White
  • Cherry Cobbler

Ink:

  • Cherry Cobbler
  • Whisper White Craft

Stamps:

  • Bella Toile
  • For the Bride

Accessories:

  • Whisper White Satin Ribbon
  • Half-Back Pearls from Pretties Kit
  • White Emboss Powder
  • Square Lattice Textured Impressions Emboss Folder- Sizzix

Remember that the New Holiday Mini Catalog is online as of today!!!  There is so much cool stuff in there I wish I could buy it all 🙂

StampinBetty