Crafty Betty

Project 79 of 365: Weekend Wedding Card September 1, 2010

I’ve got a few cards to post for you today, so we will just have to see how far we get 🙂

So I am still searching for that “dream job.”  As much as I love crafting, with all the home repairs we are in need of and some of the things my husband and I want to do, I’ve decided it would be easier to do with a steady income, as you can never really predict what’s going to happen when you are running a tiny online craft business.  Don’t worry, I have no intention of abandoning everyone!!  This blog is my “therapy” and keeps me creating.  It is the perfect mix, because all of the jobs I am qualified for are so totally different than what I do here, my arts and crafts keep me well rounded 🙂  By education and professional experience I am a TOTAL numbers person, I actually have FUN running statistical models.  In graduate school I used to affectionately refer to my advanced stats homework as being like playing with a video game….if you keep working at it eventually you will get it “right.”   And I gotta tell ya….the feeling of satisfaction of being able to make sense of all the piles of what would seem like pointless data, or random effects to most people is much the same way as I feel when I complete a cool craft project.  My life needs both of these extremes to be satisfied 🙂

It would also be nice to work in a field that actually puts my Political Science Master’s Degree to work, and help payoff those student loans…LOL!

The project I am posting today is a wedding card I made for a wedding I attended about a week ago.  This card was super quick, and you might recognize that it is very similar to other wedding cards I made this summer.  I think this is because I loved the way that first one turned out, and since I was always running short on time for all the rest I ended up making different versions based on that card.  The one thing I have tried to do on ALL the cards was to match the colors of the wedding cards to their invitations/wedding colors.  I thought this would give the cards more of a personal touch.

Project 79 of 365: Weekend Wedding in Cherry Cobbler

79 of 365: Weekend Wedding in Cherry Cobbler

Supplies:

Paper:

  • Whisper White
  • Cherry Cobbler

Ink:

  • Cherry Cobbler
  • Whisper White Craft

Stamps:

  • Bella Toile
  • For the Bride

Accessories:

  • Whisper White Satin Ribbon
  • Half-Back Pearls from Pretties Kit
  • White Emboss Powder
  • Square Lattice Textured Impressions Emboss Folder- Sizzix

Remember that the New Holiday Mini Catalog is online as of today!!!  There is so much cool stuff in there I wish I could buy it all 🙂

StampinBetty


Project 69 of 365: Eggplant Wedding August 6, 2010

I cannot believe that it is Friday already!  Where did the week go???  Oh yeah…it probably went to the brilliantly “simple” home improvement ideas I had on Tuesday.  If my husband knew what was good for him (and our bank account) he would post a picture of me by every cashier at Home Depot with a note saying DO NOT LET THIS WOMAN BUY ANY HOME IMPROVEMENT ITEMS.  LOL!!!

I think every time I step into a home improvement store I suddenly snap into this overly optimistic mood, and have delusions of my actual home improvement ideas.  Or, just to move some of the blame off myself, maybe I should sue all companies that put instructions on the back of their projects making it sound “so simple” or  “no fail.”  I think that my crafting spirit somehow believes that it can magically transform into “Super Handywoman,” because everytime I get to the store I am 100% confident that I can fix this or that all by myself, yet somehow it never quite works out the way I envisioned.

At Home Depot I purchased $80 worth of items to fix 5 issues in the house.  I was so proud of myself, and already preparing how I was going to WOW all of you with all that could be done with that money, but alas only 2 of those projects are complete (and one of those I’m still not so sure about.)

The biggest disaster was caulking the bathtub.  I tackled this first as it should have been a 30 minute job max.  We have been having problems with re-caulking the tub.  For whatever reason no caulk wants to stick, and it just peels off as soon as it gets wet (and yes we have been following the directions.)  Caulking the tub was supposed to be a surprise to Mike when he got home from work.  After all its not rocket science.  I asked the Home Depot guy what to do about the issue, and he showed me some caulk remover (as maybe the new caulk wasn’t sticking because there was too much old stuff left behind) and he picked out a caulk for me.

Our house gave me yet another surprise….When I decided I would make sure I got all the old caulk out I found yet another SNEAKY surprise left by the previous owner.  The caulk was up to 2 inches thick, and once I got to the end of that I could stick the plastic knife I was using 3-4 inches in before it was stopped by anything.  There was nothing behind the lowest level of tiles????  I was starting to get scared that the whole wall would collapse if I pulled out all the caulk…not to mention how much caulk was actually falling down inside the gaping hole between the tub the wall and the tile.  Why can’t Holmes on Homes come to Wisconsin?  Our house would be a real treat!!

So once I got all the caulk out I was left with the mystery of what to do about the hole.  In the end I realized it doesn’t make sense to over do this as we are going to have Bathfitters come in next year (hopefully) to install a tub and surround around our current tub….as much as I love the idea of real tile we have to go with what we can afford 😦  So I start pushing caulk back in the opening, and run out of caulk before finishing (since I wasn’t expecting the big hole), and now Home Depot is closed.  I was so upset, that after working on my 30 min project for over 5 hours I was basically going to have to start over the next day after I got more caulk because, the way I understand it, to get a proper seal I don’t think you can let half of it dry and then finish the rest???

Well….the next day I decided not to pull the caulk back up and start over, because I had stuffed it pretty far back in the space between the tub and tile, and instead start where I left off with the new caulk, and then when I had caulk all the way around I went back around with a thin coat all the way around.  It looks much better now, but until I take a shower after writing this article, I won’t know if it did the trick…

This was just WAY more difficult than it was supposed to be!!

As for the adventures with the rest of the home improvements I will add them to later posts.

On to something that did work out as planned….

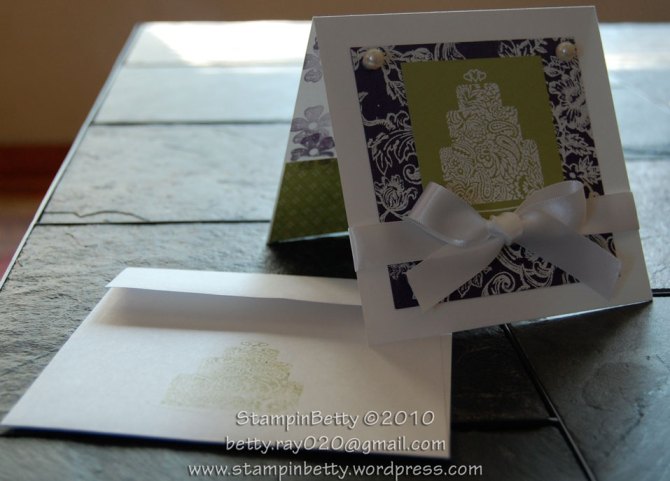
This is the card I made for a wedding Mike and I attended last Saturday.  The colors used on this card are inspired by the colors used on their invitation.

Project 69 of 365: Eggplant Wedding

69 of 365

69 of 365: Eggplant Wedding

Supplies:

Paper:

  • Whisper White
  • Elegant Eggplant
  • Pear Pizzazz
  • Old Olive DSP (didn’t have Pear Pizzazz)

Ink:

  • Versamark
  • Elegant Eggplant
  • Pear Pizzazz

Stamps:

  • For the Bride
  • Bella Toile
  • Very Versatile
  • Vintage Vogue

Accessories:

  • Satin Ribbon
  • Pearls
  • White Emboss Powder

Check back for more projects and Home Improvement Thrills 🙂

StampinBetty


Project 34 of 365: Baja Breeze Wedding June 22, 2010

So it has been a few days since my last post….It has been pretty busy around here.  Went to a wedding on Saturday, went to Polish Fest on Sunday (yep, my husband is half Polish and half Italian), and survived some more crazy weather yesterday.  Suffice it to say I was not going to be in the third level of our house while we were under a Tornado WARNING 🙂  Luckily, living so close to Lake Michigan (just a few blocks away), once all the crazy stuff hit the cooler air of the Lake everything simmered down, and passed over us.  Unfortunately, we can not say the same for areas just West of us that were hit by the same storm.

I have NEVER been good about being alone in serious weather.  Some people think its a thrill, but not me, I am the first one into the basement every time. My husband laughs at me, but if he thinks I am bad now he should have seen me as a little kid where I would actually be crying out of fear that a tornado was going to get me.  I used to even have reoccurring nightmares about running from tornadoes and having nowhere to go.  At least now I am fine with thunder and lightening, and even wind, but I still don’t do well when they start reporting serious wind damage, or there are reports of tornadoes anywhere near or heading in our direction.

I have found a system that helps me NOT panic, and keeps me calm enough to handle the storms without giving it away to others that I am actually terrified.  I have an actual action plan of what to do.  I think the reason why it works so great is that it keeps me busy organizing, and doesn’t leave time for panic.  It is all planned out, I know exactly what to do.  The best part is that EVERY time I have put my action plan into action (because of actual tornado warnings or sirens) the storms always deteriorate or quickly pass without any of the forecasted dangers.

On to happier things…

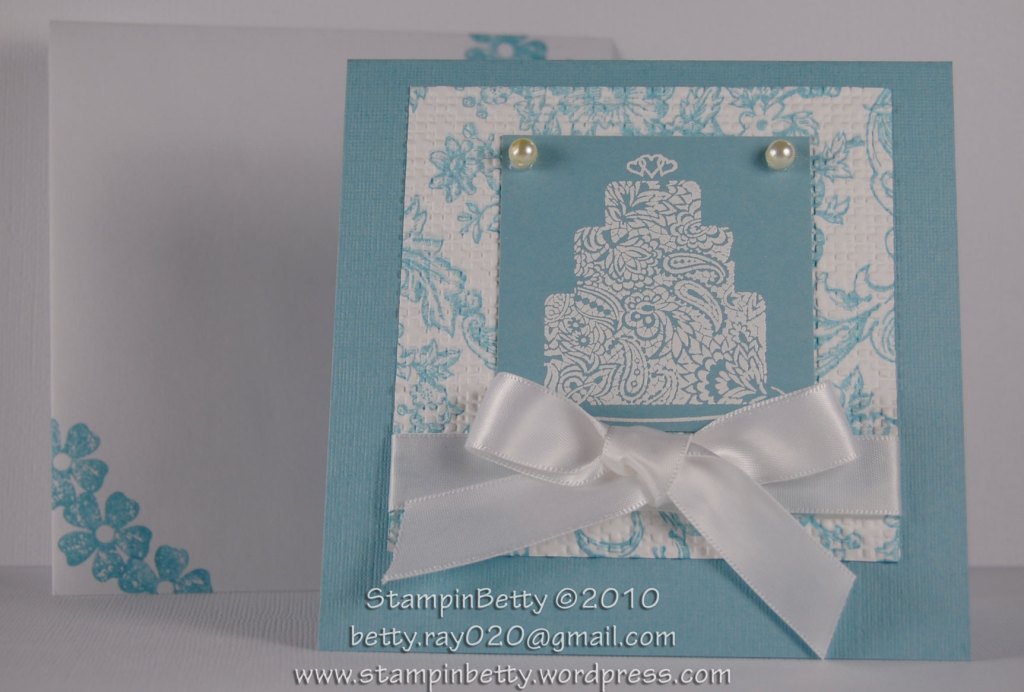
The project I am posting today is the card that I made for the wedding we attended this past Saturday.  I chose the colors to match the colors they used on their invitations.  On this card I did a few “extra” things that I do not do often; I simply decorated a coordinating envelope, as well as putting a little extra effort into decorating the inside of the card.

Project 34 0f 365: Baja Breeze Wedding

34 of 365

34 of 365: Baja Breeze Wedding

Inside of card:

Supplies:

Paper:

  • Whisper White
  • Baja Breeze
  • Baja Breeze DSP

Ink:

  • Versamark
  • Baja Breeze

Stamps:

  • For the Bride
  • Bella Toile
  • Vintage Vogue
  • Very Versatile

Accessories:

  • White Emboss Powder
  • Square Lattice Textured Impressions Emboss Folder
  • White Satin Ribbon
  • Pearls

That is all for now.  Check back soon, as I have been working on a huge organization project for organizing your paper and stamps!!  It is taking a long time to complete this, but it will all be worth it when completed!!

Til Next Time,

StampinBetty


Project 21 of 365: Blue Bride June 9, 2010

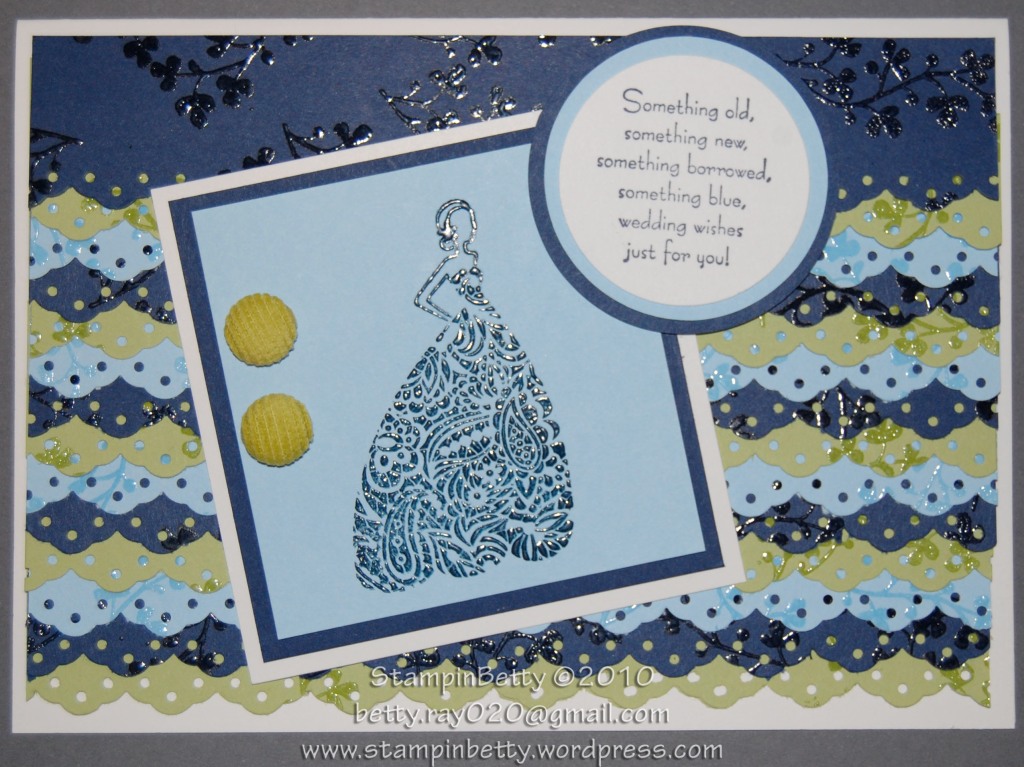
Isn’t it funny when you sit down and you have a project in mind, and you work, work, and work on it….Then in the end your project is nothing like the one you started making?  Well, that is exactly what happened here.

While I like this card, I was NOT planning on making a wedding card, and I was NOT planning on running the Frilly Lacey border all the way up the card.  So this is truly one of those projects that revealed itself as it went along…Luckily I am happy with the outcome…but it does seem like something is missing, so if anyone has any suggestions on what this card needs for that “finishing touch” please let me know by leaving a comment below.

This card started from the Mojo Monday 142 challenge, and then I also got the colors from the Curtain Call Color Challenge Act 33.  I love combining these two challenges!  They both come out on Monday and it is SOOOOOO much easier to jump in and get a project finished when you already know what colors AND layout you are using.

Project 21 of 365: Blue Bride

Mojo Monday Week 142 & Curtain Call Color Challenge Act 33 Submission

21 of 365: Blue Bride

21 of 365: Blue Bride

It is probably a good thing this became a wedding card, as it seems like every week we are getting another wedding invitation, so I will need plenty of wedding cards this year.  Hmmmm, maybe my husband and I should get around to having that Wedding Reception we told everyone we would have when we broke the news that we decided to have a small wedding in Vegas instead of a big wedding at home…

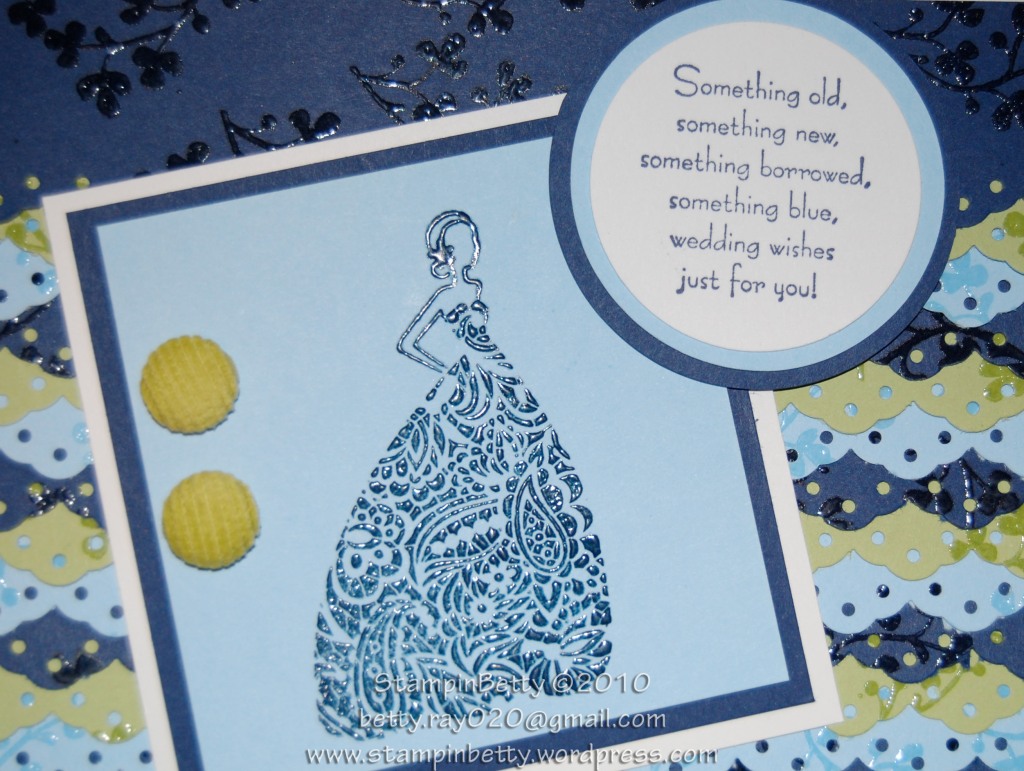
Close Up of Card:

21 of 365: Blue Bride

21 of 365: Blue Bride

Supplies:

Paper:

  • Whisper White
  • Night of Navy
  • Bashful Blue
  • Certainly Celery

Stamps:

  • For the Bride
  • Blissful Bride
  • Fresh Cuts

Ink:

  • Night of Navy Classic
  • Night of Navy Craft
  • Versamark

Accessories:

  • Clear Emboss Powder
  • Heat Gun
  • Snail Adhesive
  • Kiwi Kiss Corduroy Buttons

For more information on the Mojo Monday Challenge Click on Picture below:

For More information on the Cutain Call Color Challenge Act 33 Click on picture below:

Thank you for checking out my cards!!  Come Back soon to see what’s new.

StampinBetty